
Today we will have the CSL X600 V3 Quadcopter Aircraft Combo Kit building instruction. Some may thing it is hard to assemble and need a lot of technique, just see how it works. If you haven’t got it, just buy it from here.
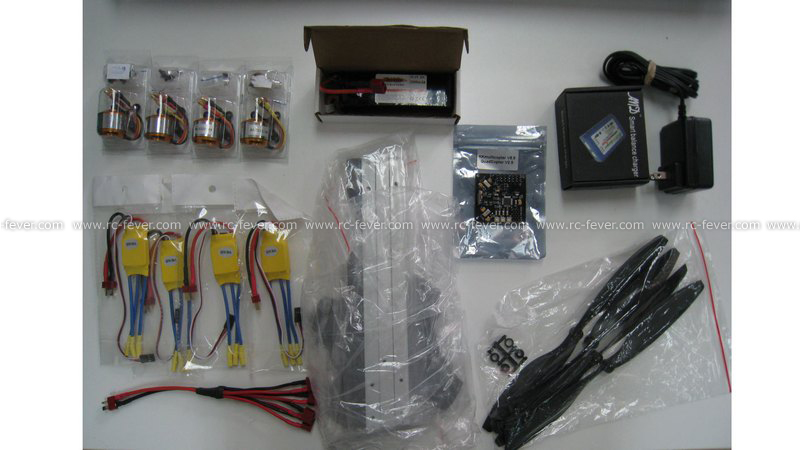
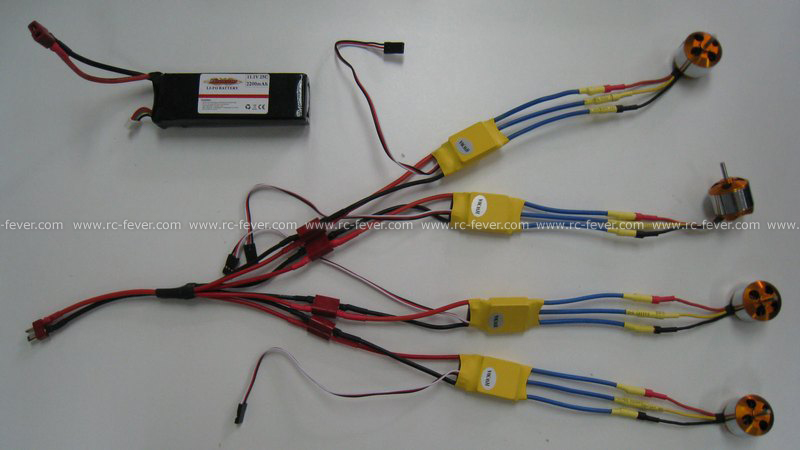
This is the items included in a combo set: ESCs, motors, battery, body frame etc.
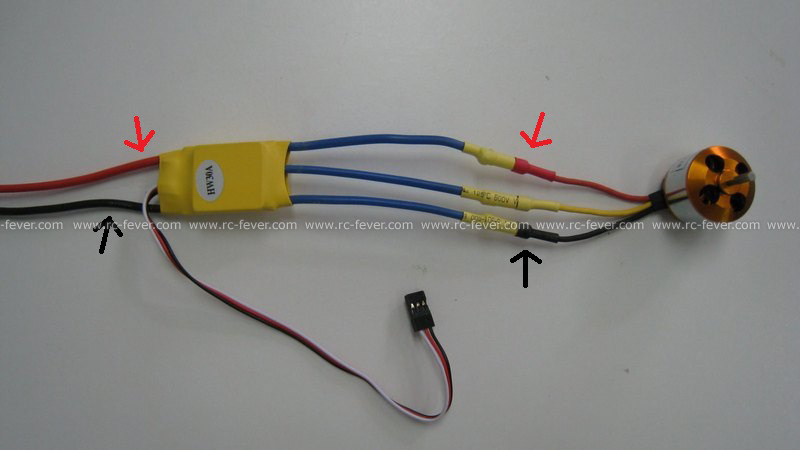
This is the temporary ESC motor connect, red to red and black to black. The middle wire from ESC connects to yellow. Later on if you need to reverse the motor rotating direction, just change the wire between black and red.
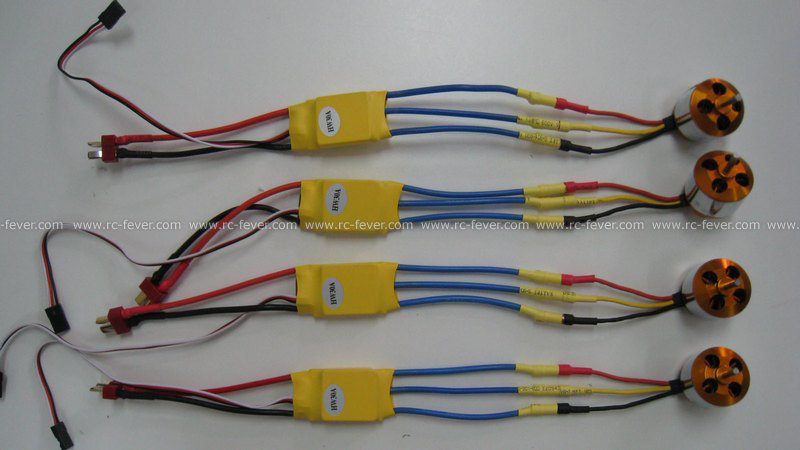
Do the some to all the ESCs and motors.
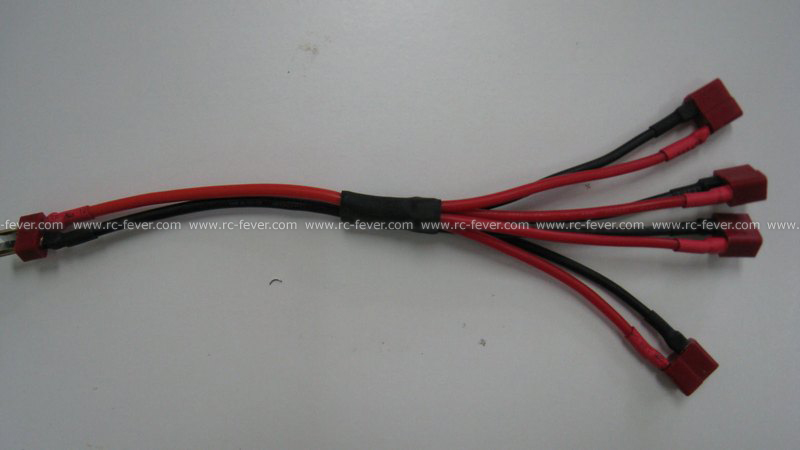
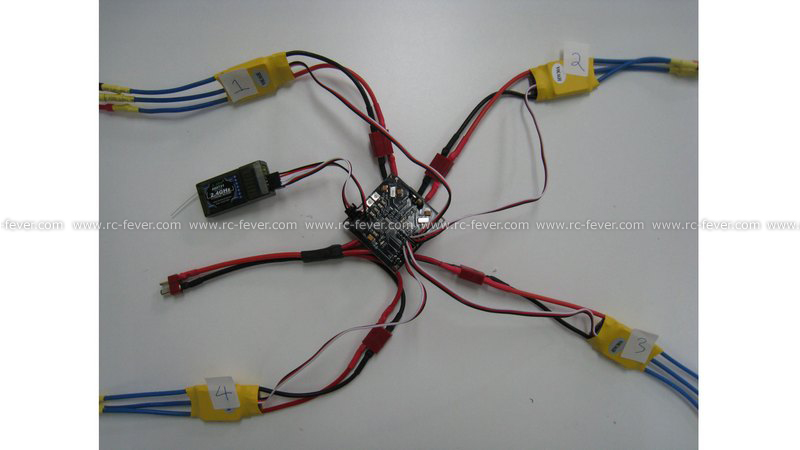
This is the cable that can distribute the power to four plugs, keeping the same voltage by the parallel connection of wires.
Connect the four ESCs to the cable just as shown, while connect to the battery, all the ESCs and motors is powered.
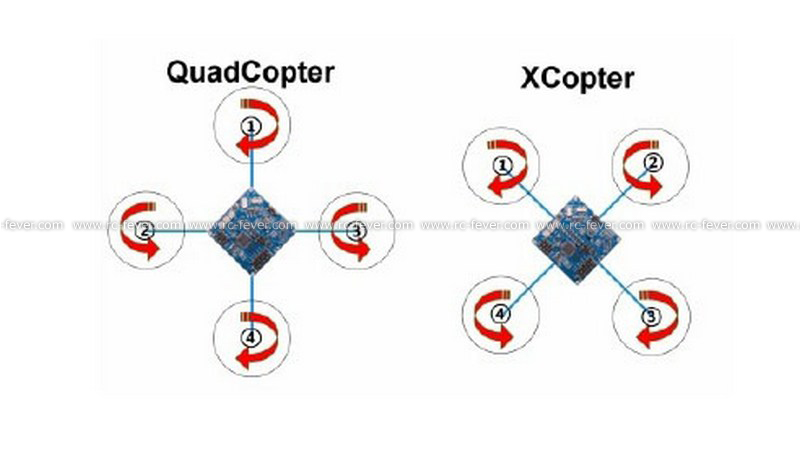
You can see there are two flying pattern of this multicopter, Quadcopter is a propeller on the front and XCopter is two propellers on the front.
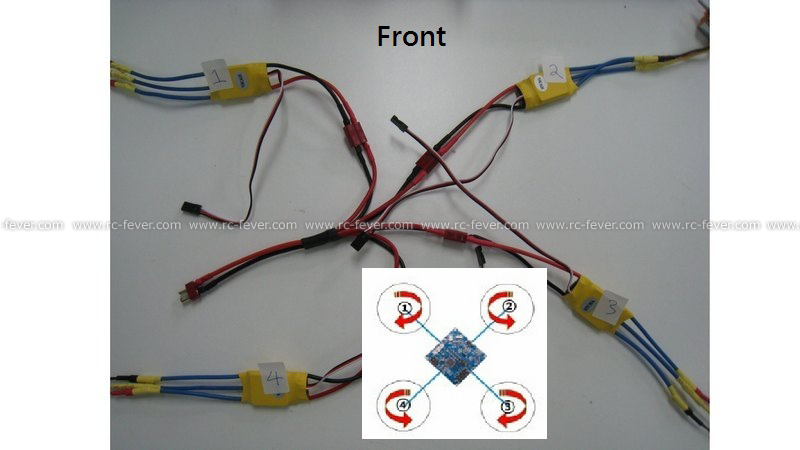
Take XCopter as an example, assign the number to four ESCs, the numbers is according to the flying pattern that you choose.
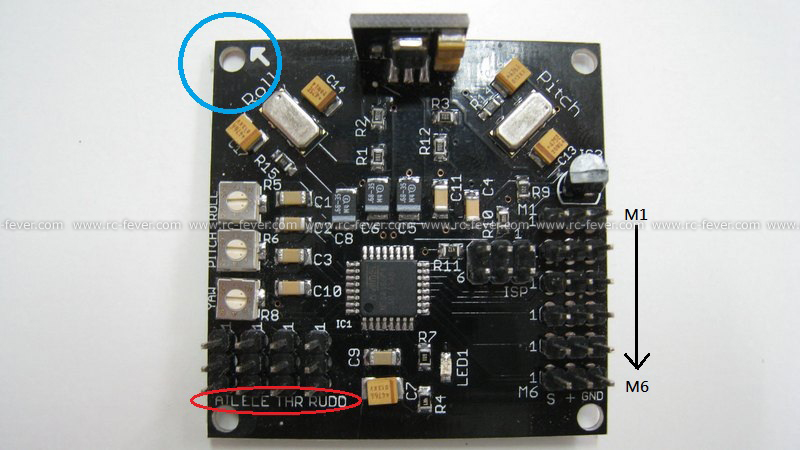
Let’s see the flight control board. M1 to M6 is use to connect to the ESCs, the order just as the number that you just assign to the ESCs. The left top blue circle shows the direction arrow, this arrow always point to the front during assemble. The Left low corner you can see the “AIL”, “ELE”, “THR” and “RUDD”.
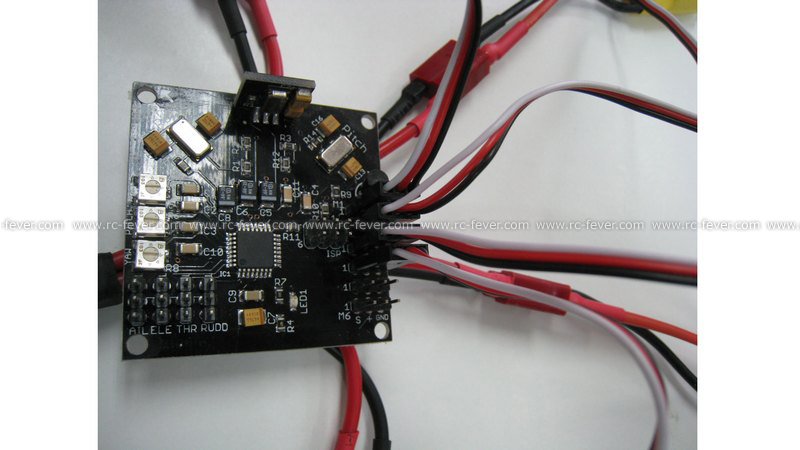
Connect the ESCs’ data cable to the corresponding position according to the number. M1 to M6, in this case only four cables since it is a four motors multicopter.
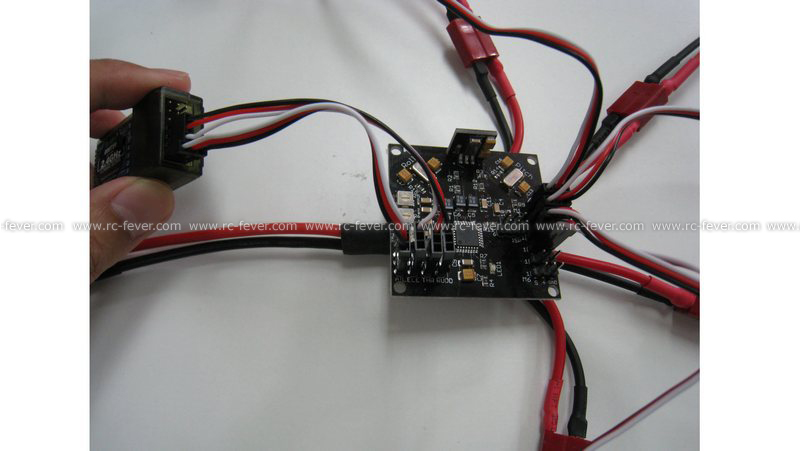
Connect the “AIL”, “ELE”, “THR” and “RUDD” to the receiver. You can see only the “AIL” have three wires and others have only one wire, it is because the two wire is for power supply, therefore only one channel supply power to receiver is enough.
You can see all the electronic parts are well connected, just install them to the body and the basic structure setup is nearly finished.
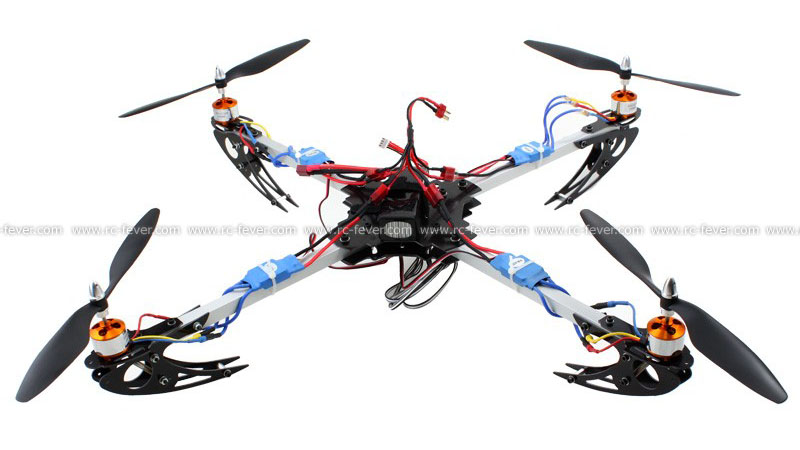
This is the ready to fly photo of this multicopter, you can see we still haven’t install the propellers and haven’t talk about how to start up the flight control board, keep follow our blog and we will have it soon.